This guide shows how to enable camera trap image annotation by computer vision AI model on a WildObs Image Platform project.
This guide is for WildObs platform testers only. You will not be able to sign in to the WildObs test platform if you have not been invited by the WildObs team. If you are interested in becoming a platform tester, please register your interest here.
TABLE OF CONTENTS
1. Navigate to your project annotation settings
2. Choose an AI model for your project
3. Enable automatic annotation
4. a) Annotate an existing deployment
4. b) Add a new deployment with automatic AI annotation
7. Add, edit or delete annotation
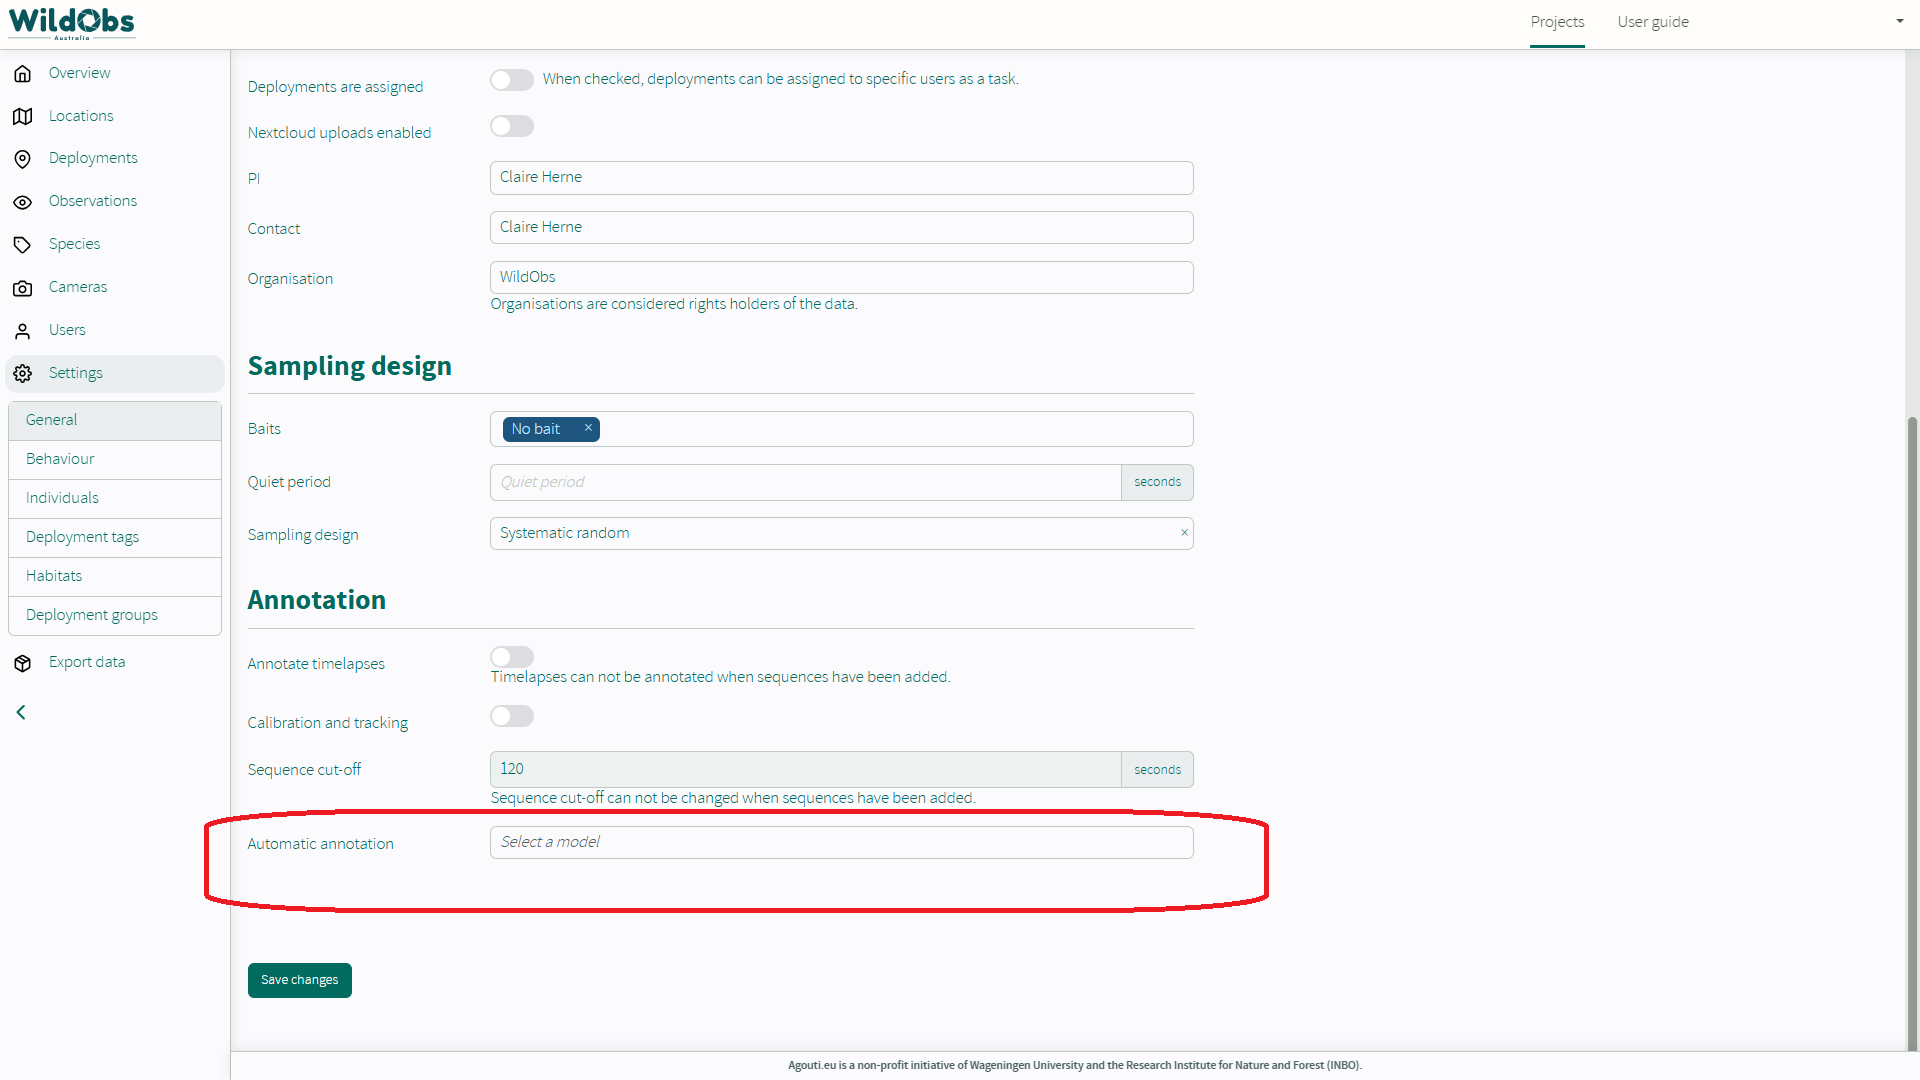
1. Navigate to your project annotation settings
Follow the WildObs Image Platform Quick Start Guide to navigate to your project settings and scroll down to "Annotation".
2. Choose an AI model for your project
Click the "Select a model" drop-down menu to choose an annotation AI model.
3. Enable automatic annotation
Once a model has been selected, a new option "Automatically with new photo series" appears and is enabled automatically.
If you do not want the option for new deployments to be annotated by AI automatically after saving, disable this option.
Automatic annotation can also be selected when adding a new deployment.
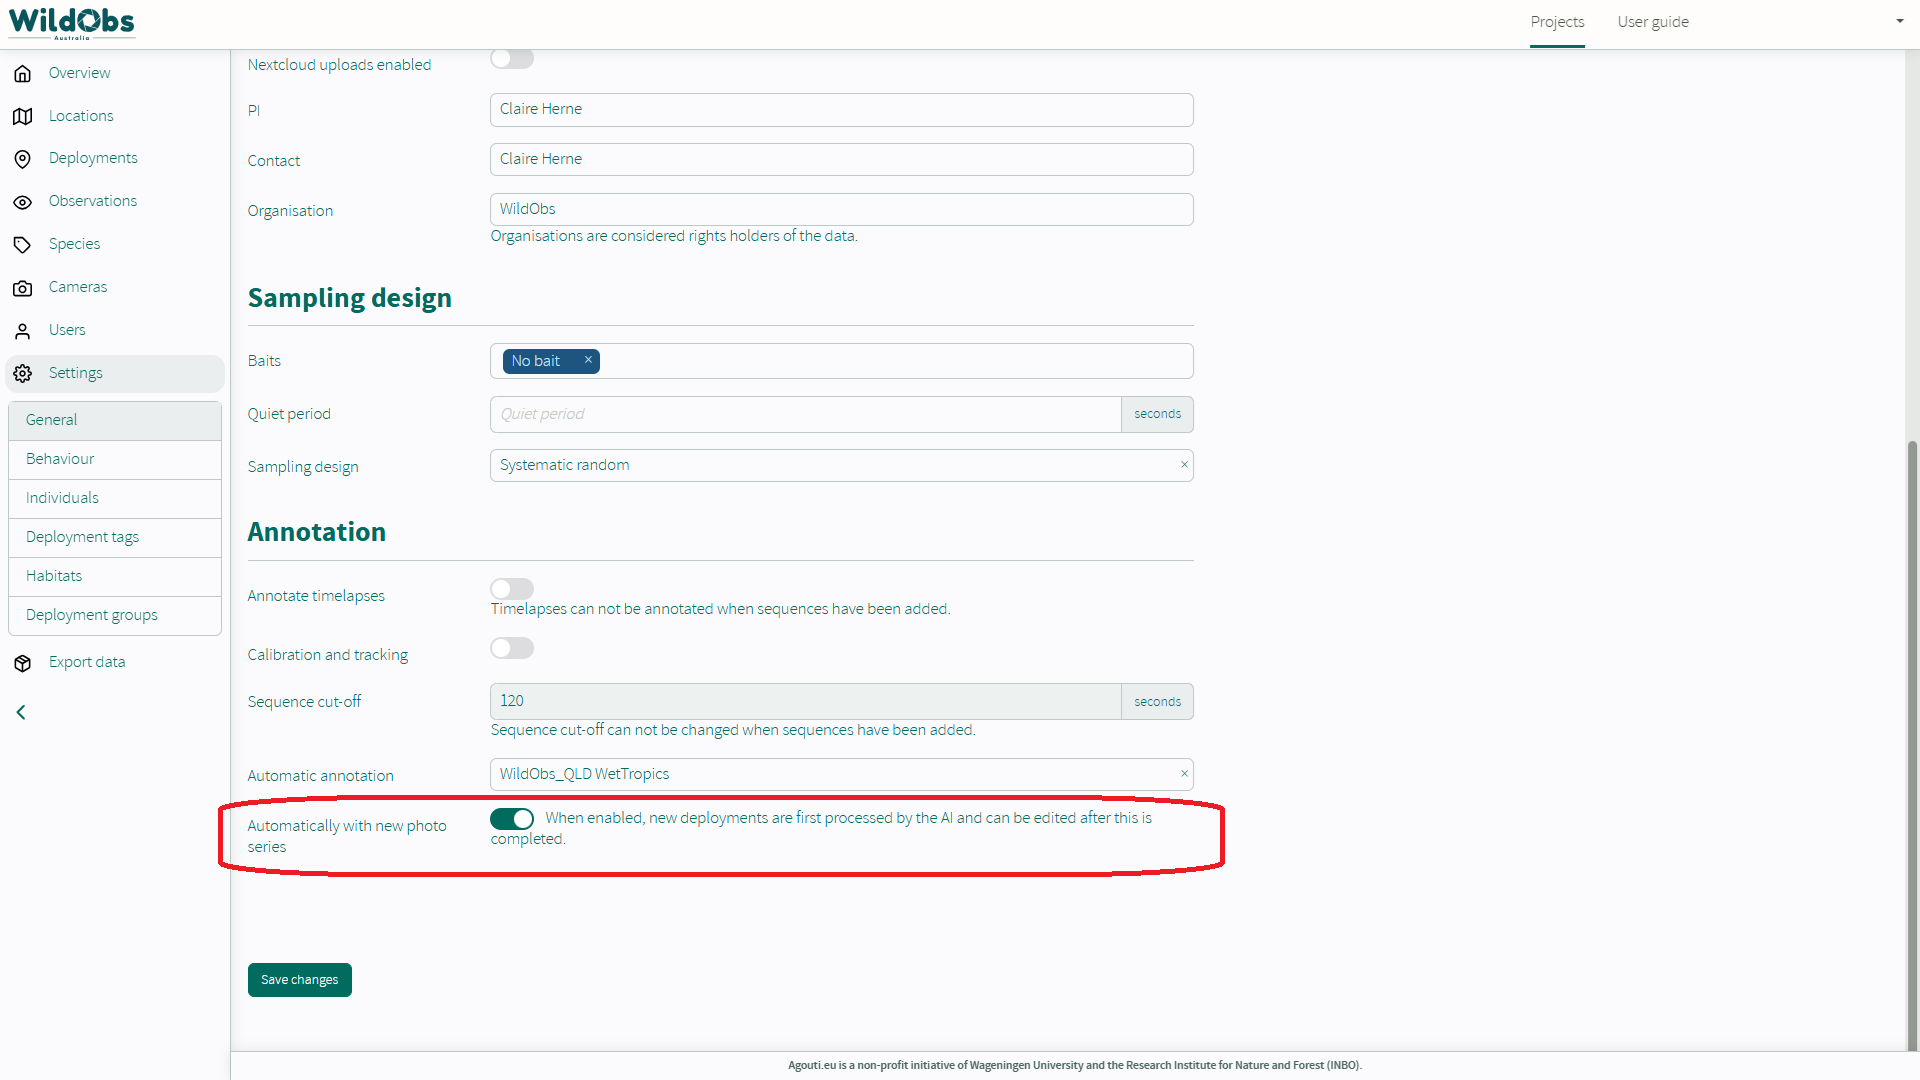
Click "Save changes" to update your project settings.
From here, you can Annotate an existing deployment or Add a new deployment with automatic AI annotation.
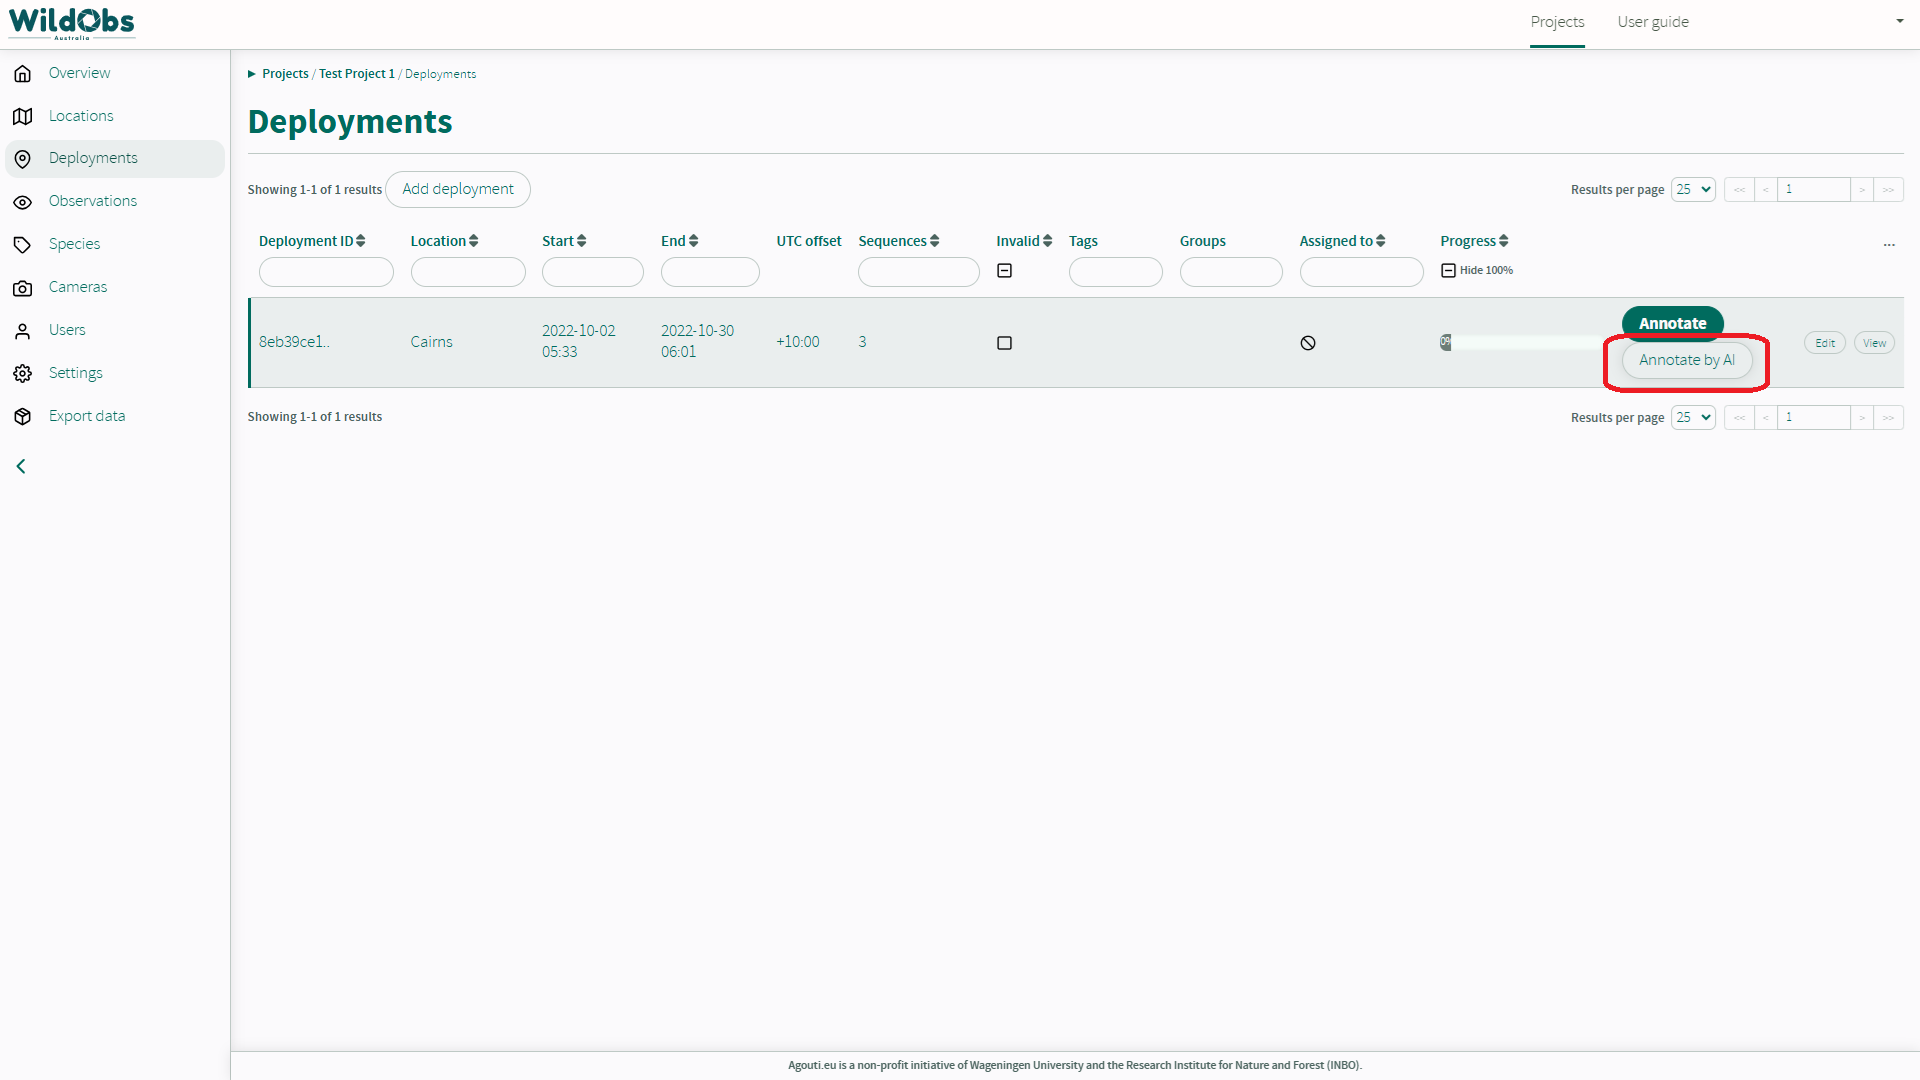
4. a) Annotate an existing deployment
To annotate a deployment which has not previously been annotated by AI, navigate to "Deployments" in the left side menu. "Annotate by AI" button now appears under "Progress" for a deployment with images. Click "Annotate by AI" to start the annotation job.
4. b) Add a new deployment with automatic AI annotation
Now that automatic AI annotation has been added at the project level, when a new deployment is being added (see Add a deployment to your project), there will be a new option for "AI processing" after "Notes". When this option is selected, images will begin AI annotation immediately after images are clustered into sequences.

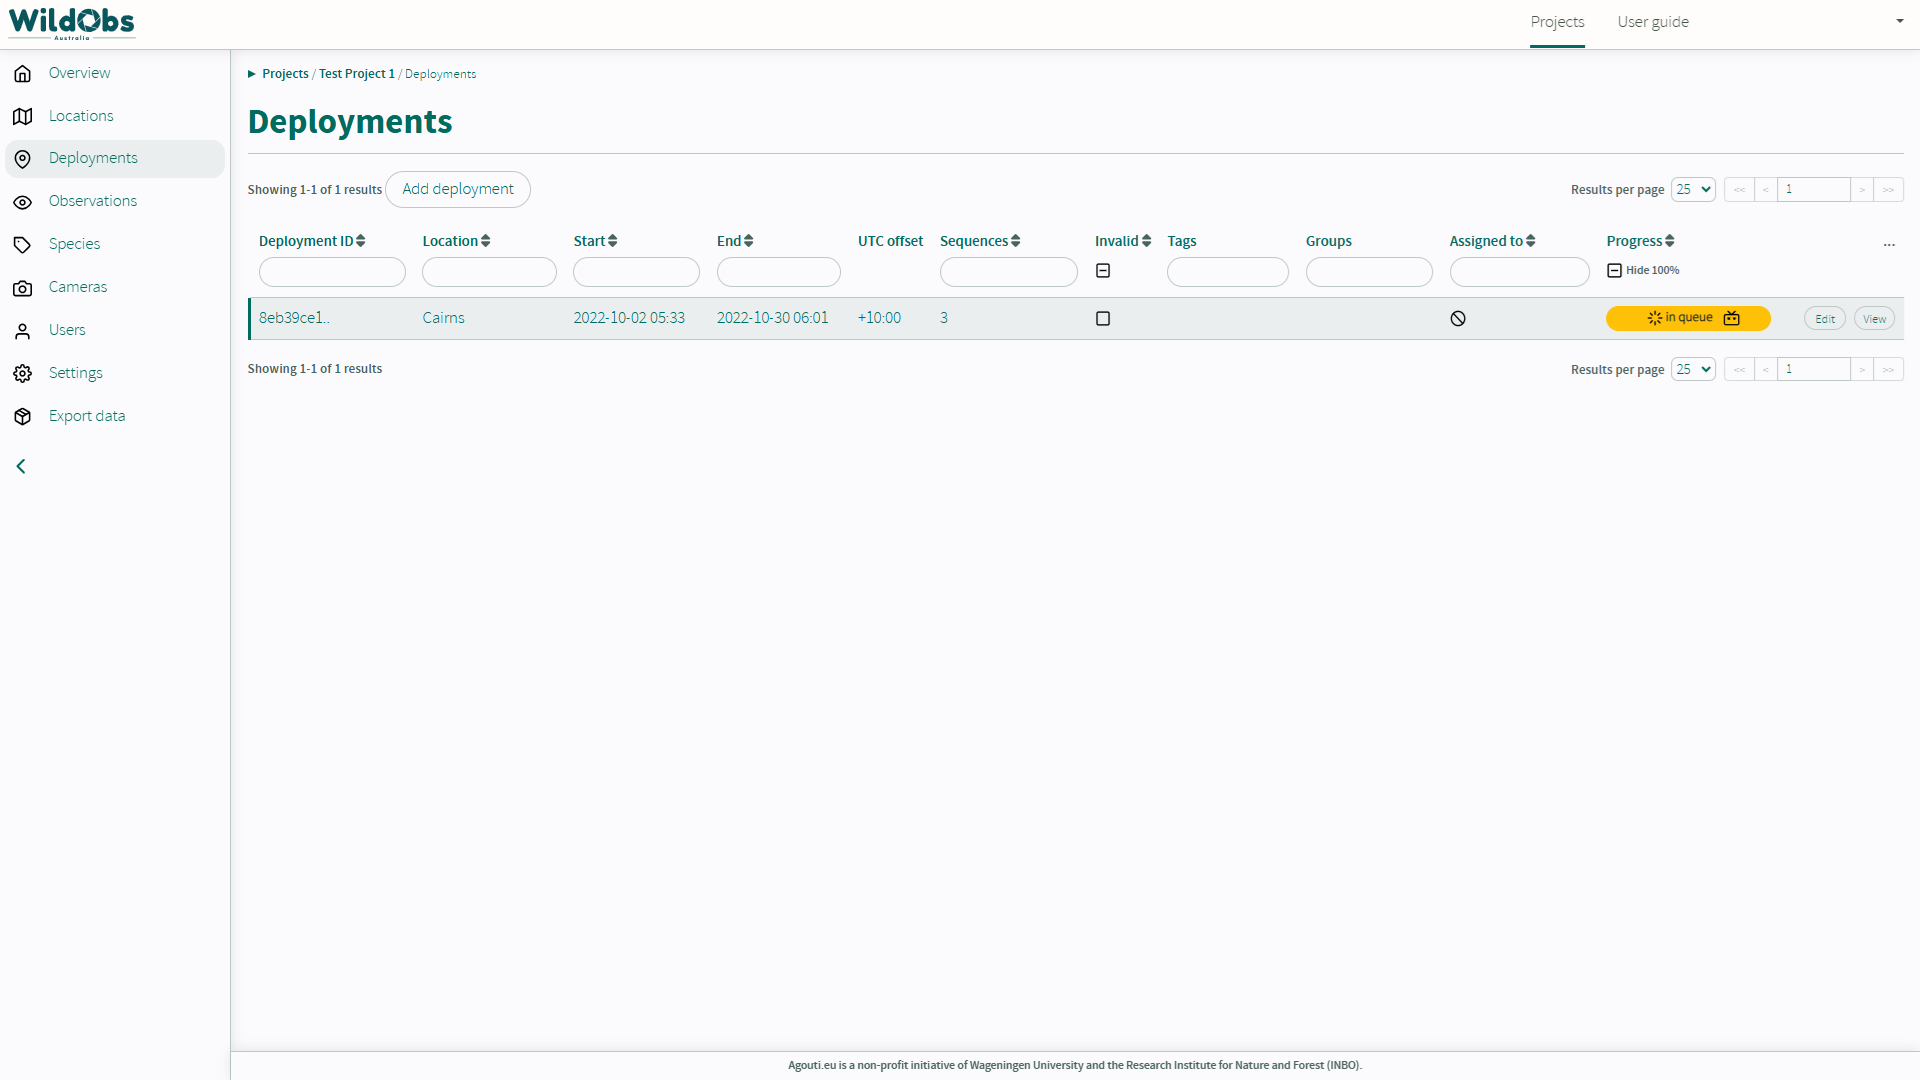
5. Annotation progress
Once a deployment has been submitted for annotation by AI model, either as an existing deployment or a new one, the "Progress" field will change to show annotation job status. The field will be a yellow card when queued or a green bar while in progress.
Note: Refresh the deployments page to see the updated status.
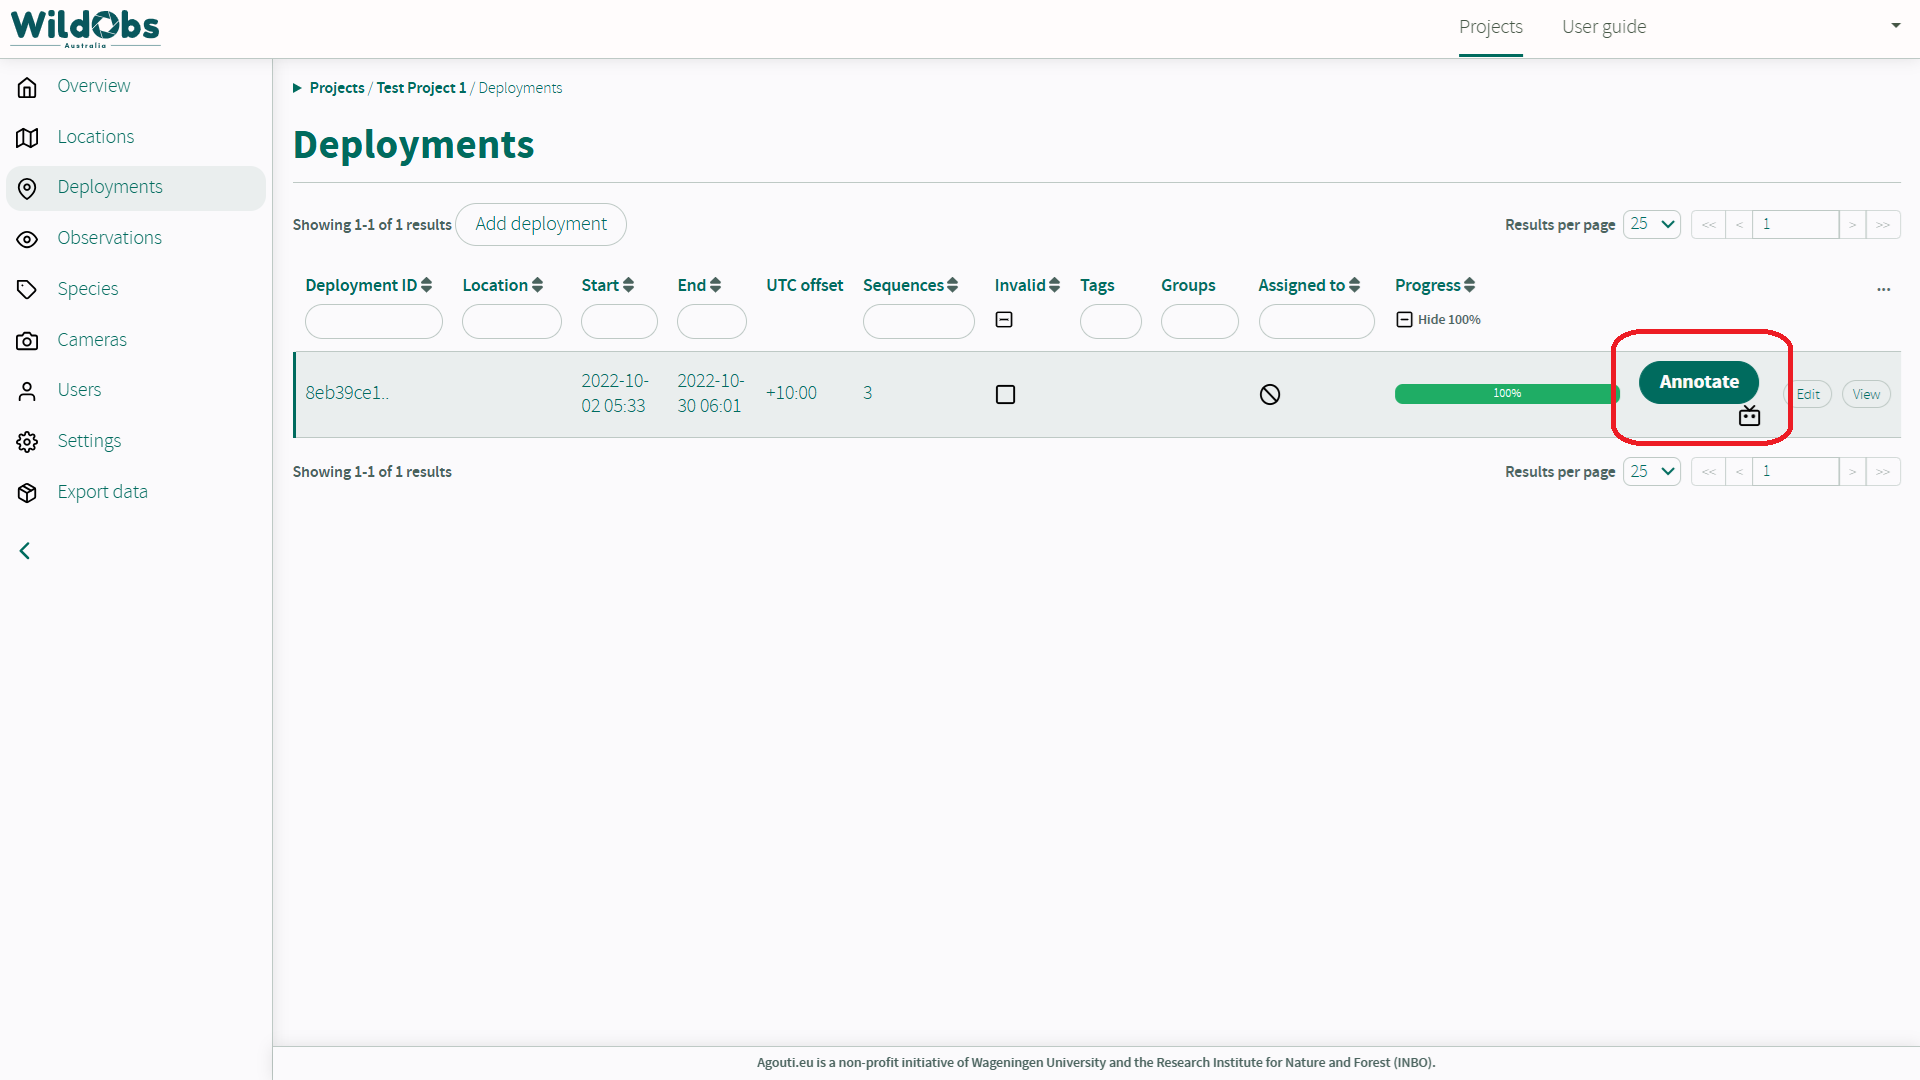
6. View AI annotation results
Once complete, the "Progress" field will show the "Annotate" button with a robot icon next to a green progress bar. If the green progress bar does not show 100%, some sequences were unable to be annotated, possibly due to low confidence score or poor image quality.
View the AI annotation results individually by clicking the "Annotate" button.
7. Add, edit or delete annotation
The platform will navigate first to sequences that do not have annotations. Manual annotations can be added for those that do not have AI annotations added. For more detail, see How to annotate your camera trap images (in progress).

Next steps
Invite others to collaborate on your project
Was this article helpful?
That’s Great!
Thank you for your feedback
Sorry! We couldn't be helpful
Thank you for your feedback
Feedback sent
We appreciate your effort and will try to fix the article