This guide is for WildObs platform testers only. You will not be able to sign in to the WildObs test platform if you have not been invited by the WildObs team. If you are interested in becoming a platform tester, please register your interest here.
TABLE OF CONTENTS
2. Navigate to the Image Management Platform
1. Sign in to WildObs
Visit the link provided by the WildObs team to the test environment:
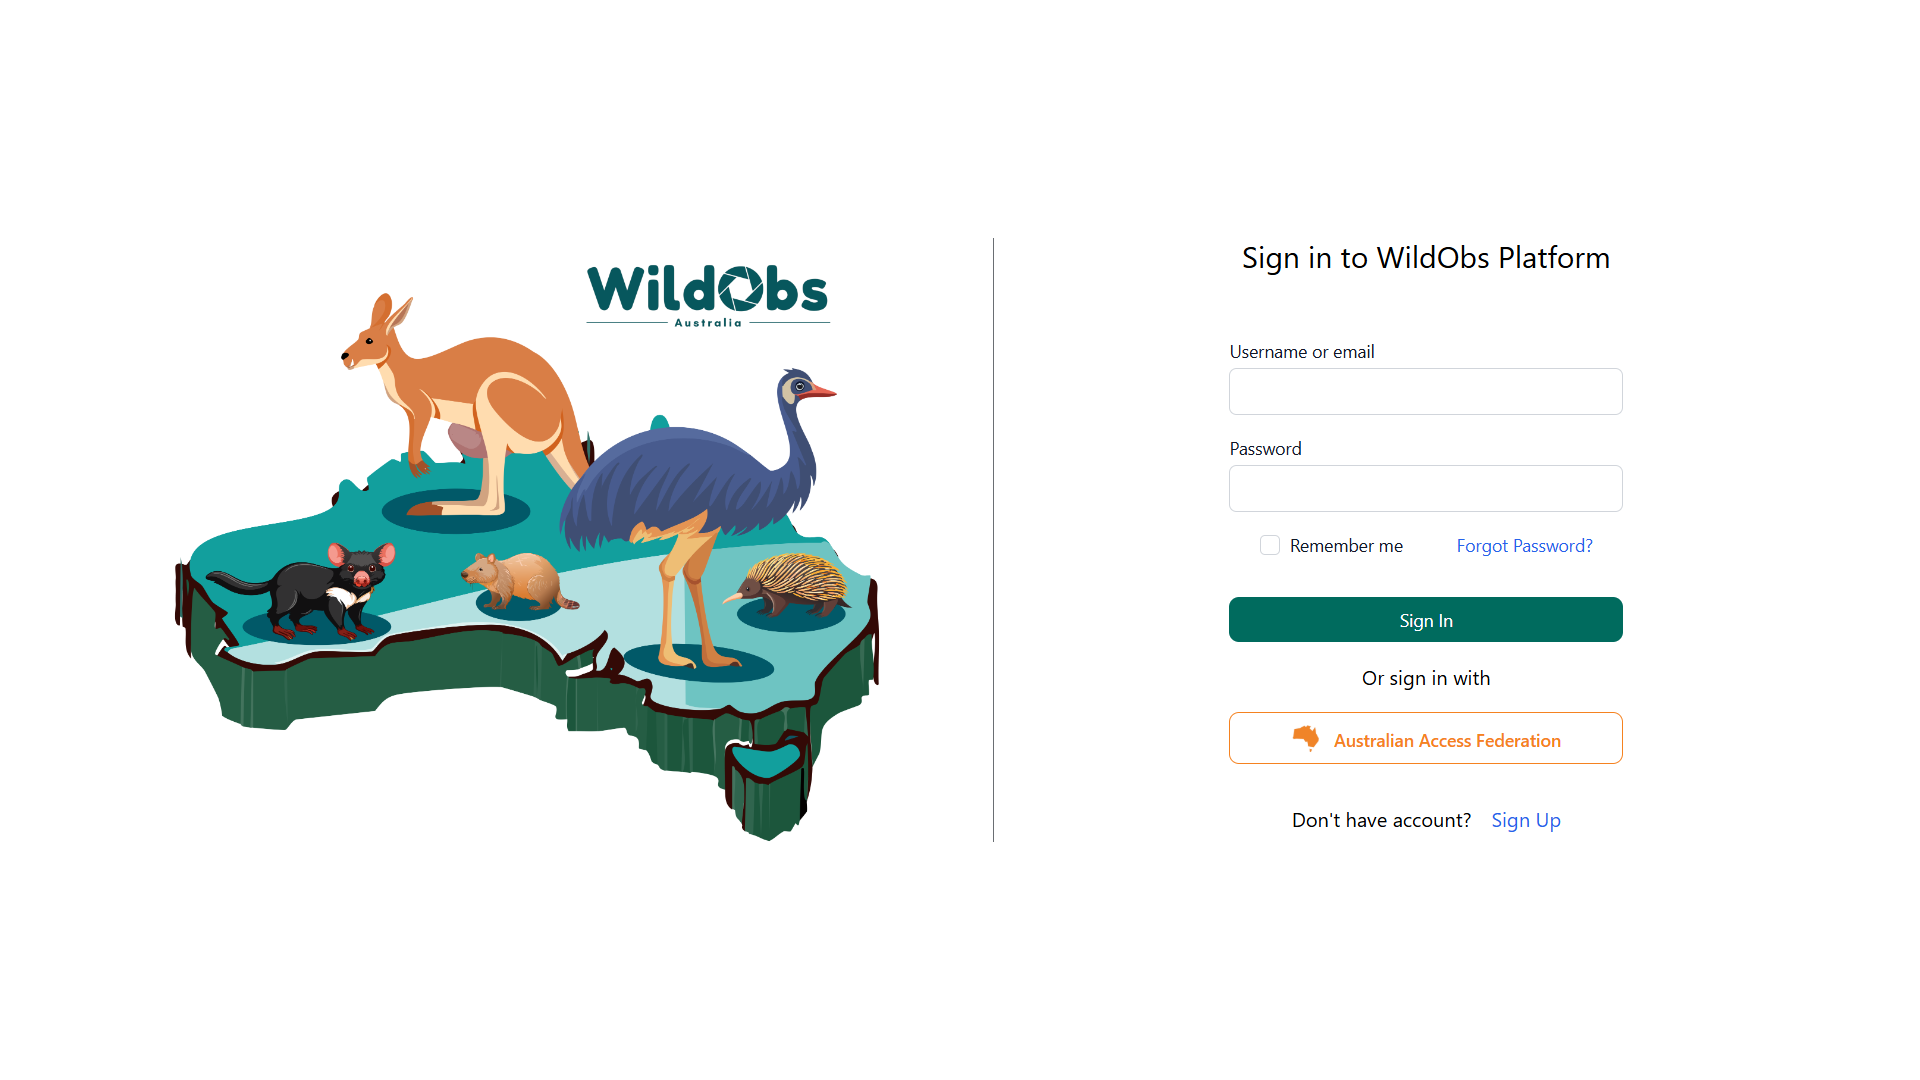
If you have access to Australian Access Federation (AAF) Single Sign On through your institution, please click the Australian Access Federation button and follow the steps to authorise your login.
If you do not have access to AAF, please click Sign Up if you do not already have an account or use fields to sign in.
2. Navigate to the Image Management Platform
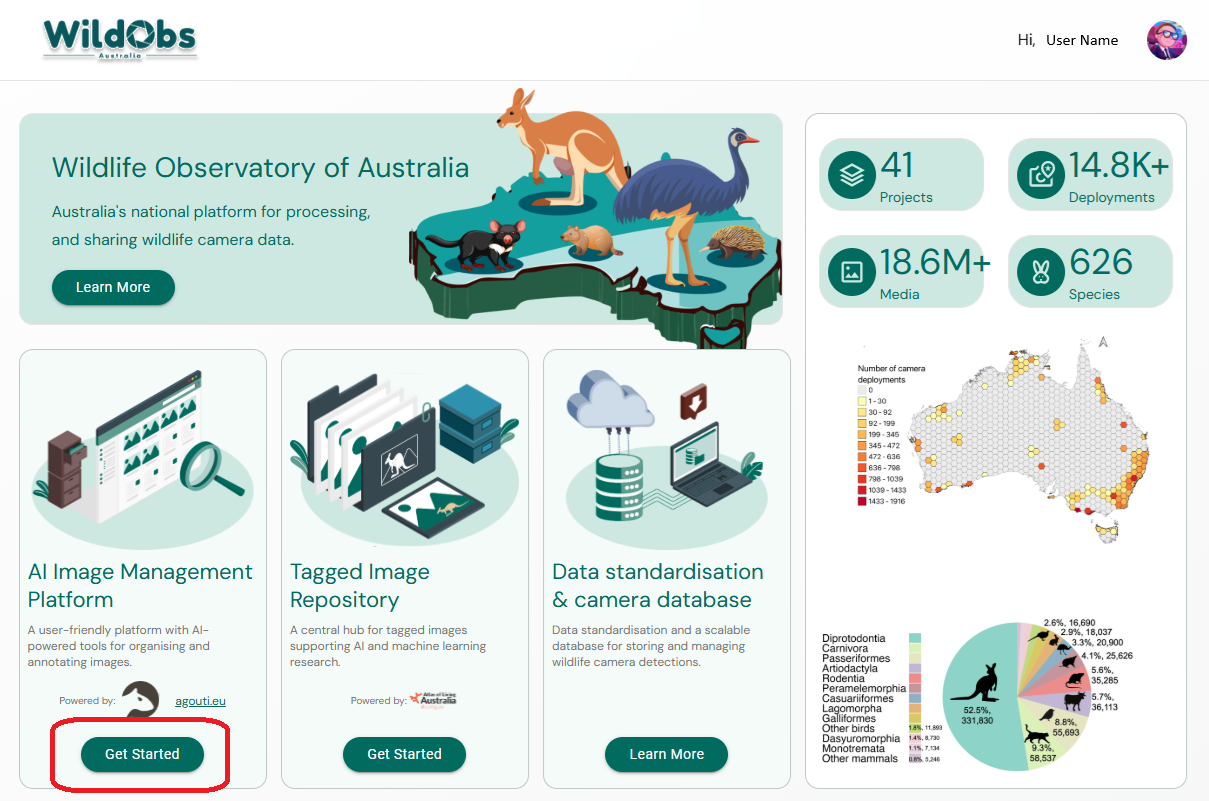
Once signed in, you should see the WildObs dashboard landing page.
Please click on "Get Started" under "AI Image Management Platform":
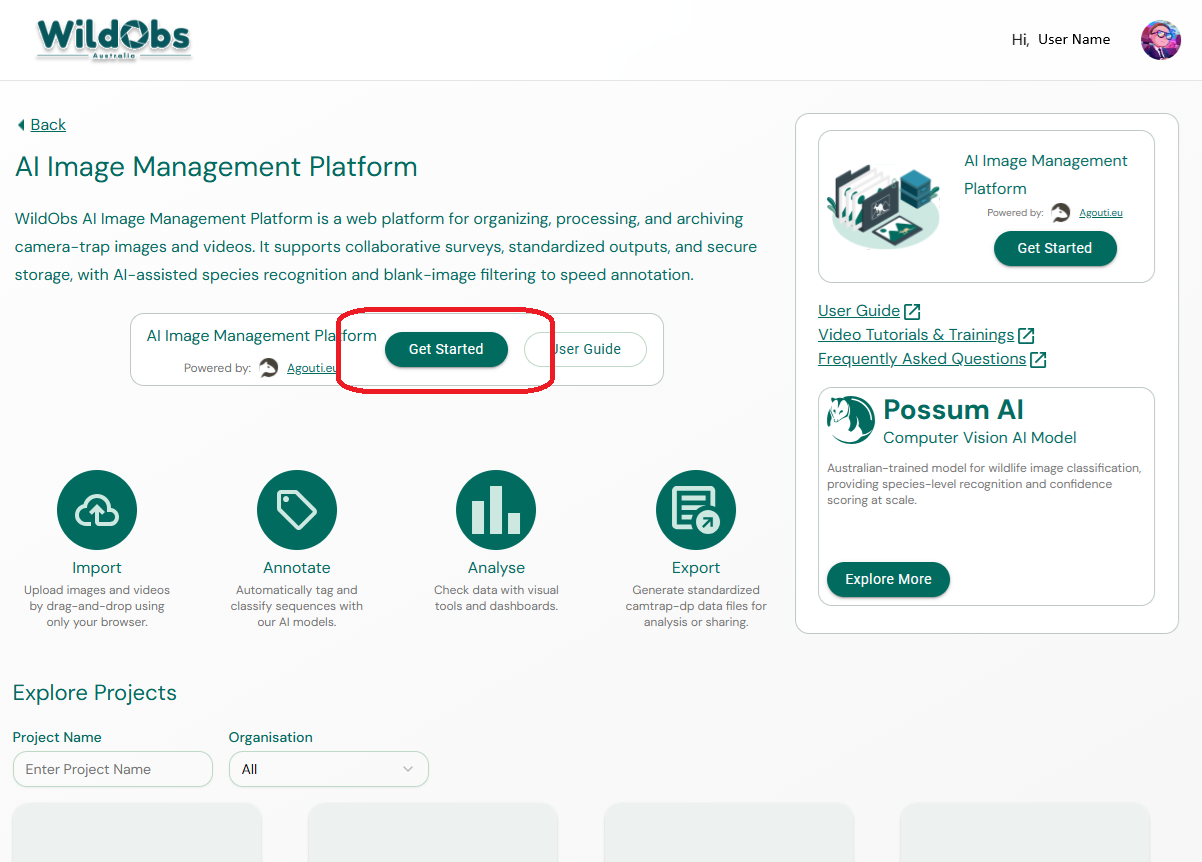
On the AI Image Management Platform dashboard page, click "Get Started" again to launch the app:
3. Create a project
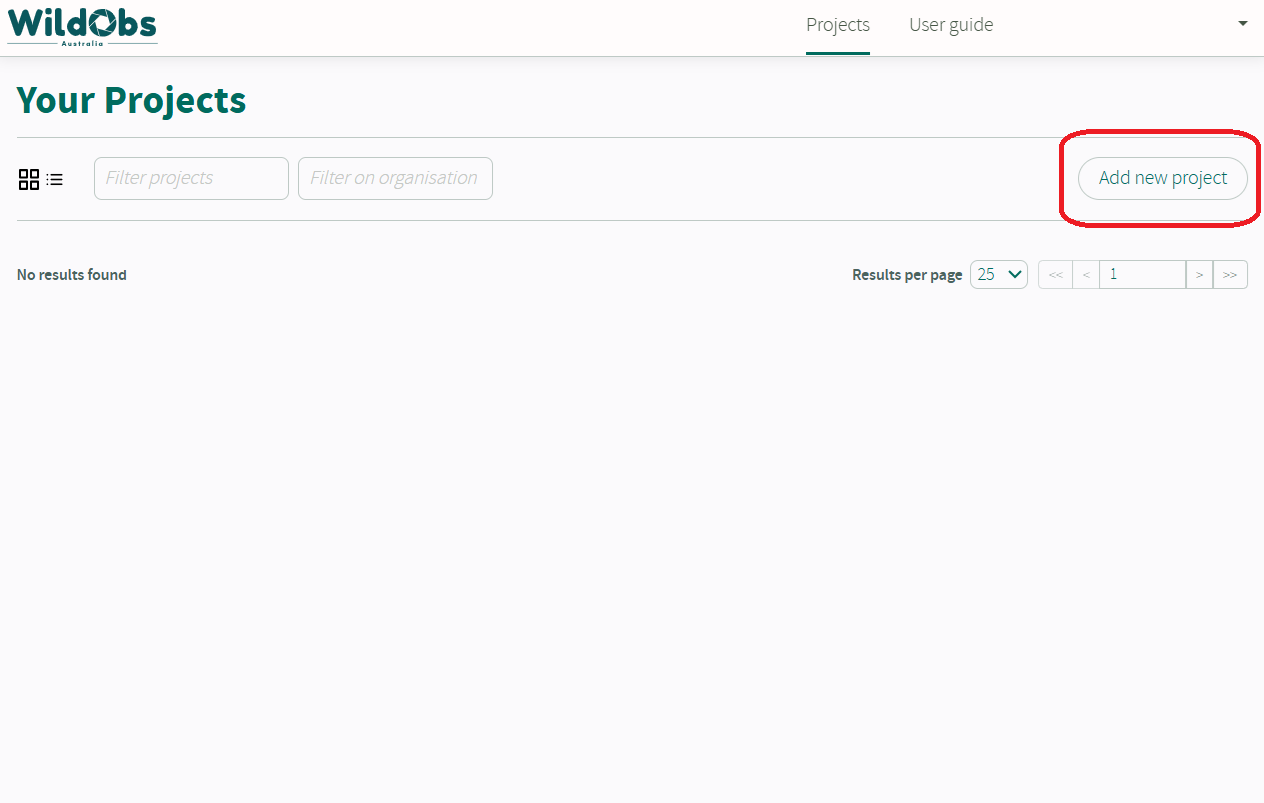
Once launched, you should see the Projects page of the WildObs Image Platform. If you are logging in for the first time, you will not see any projects.
To create a new project, click on "Add new project":
Note: A new project is created immediately, even if the project is not saved.
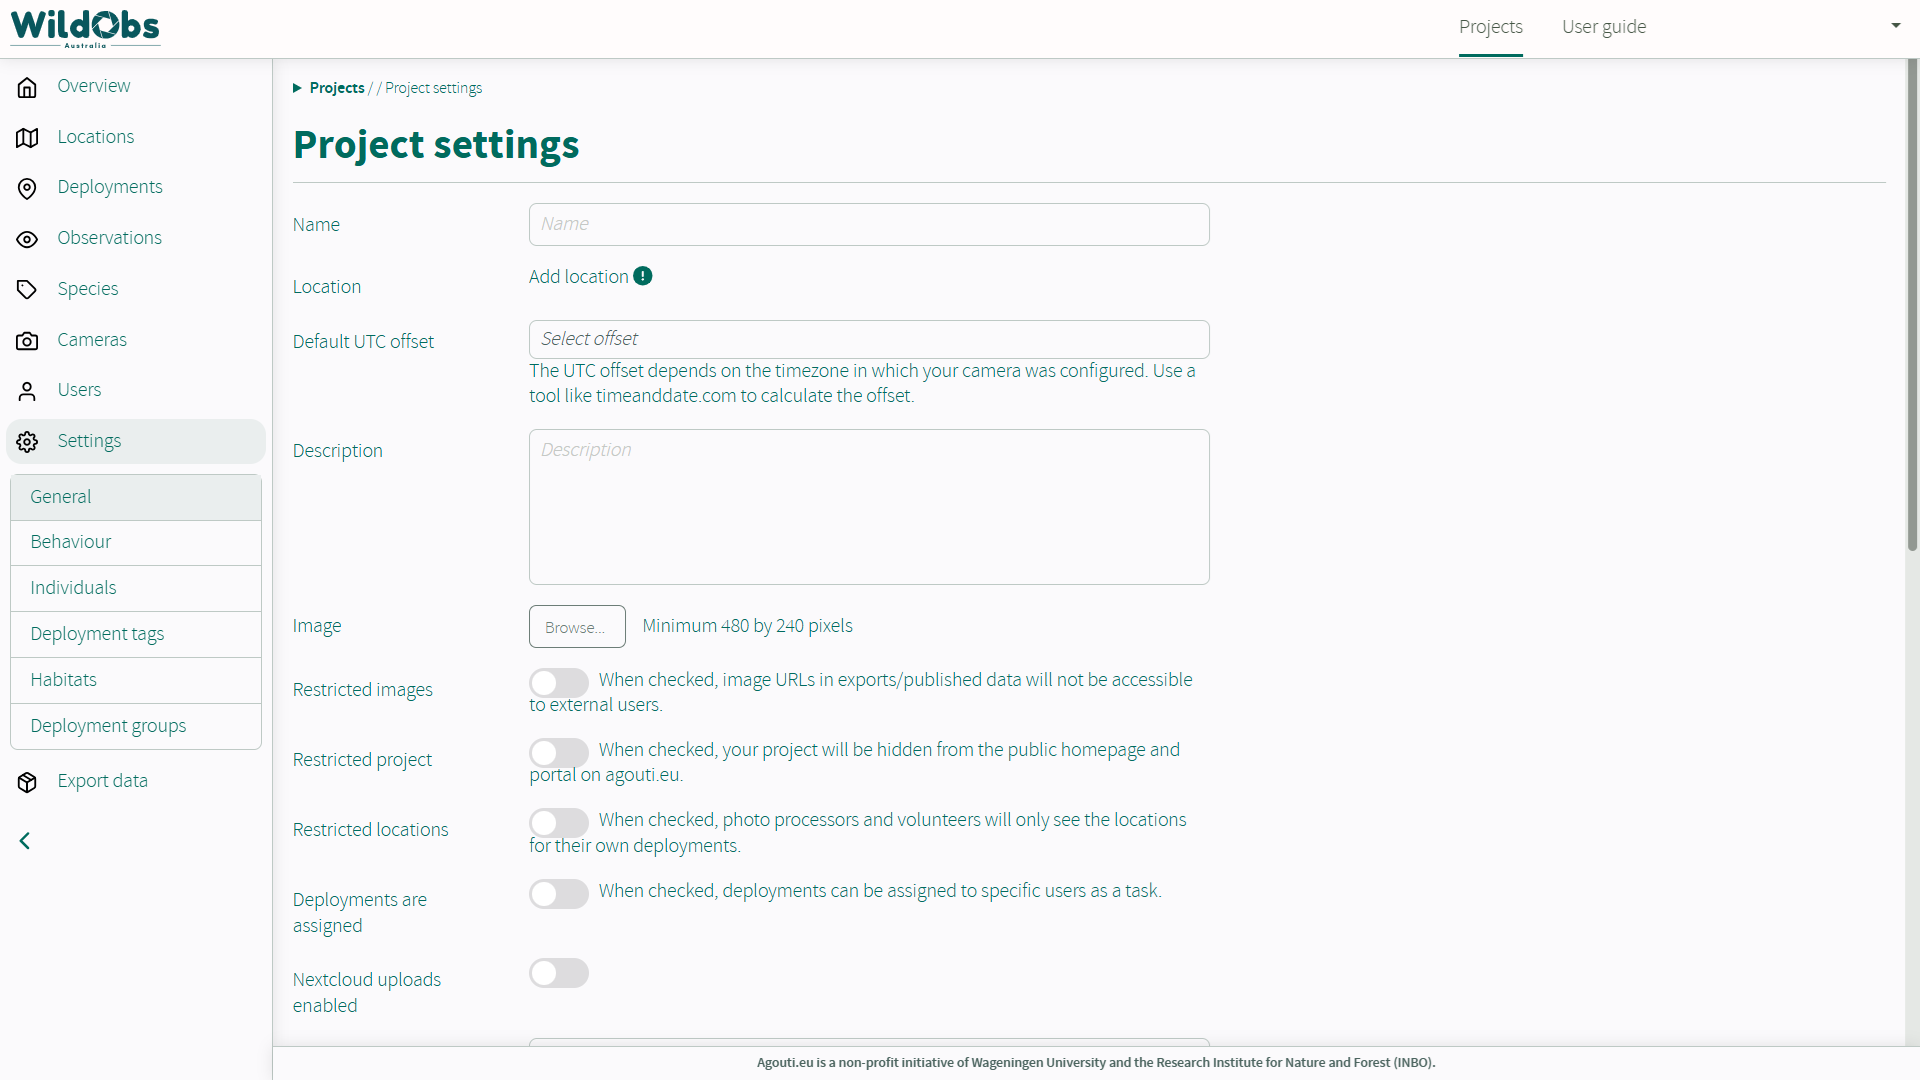
4. Enter project settings
Enter details about your test project and click "Save changes". For more information on Project settings fields, visit the Agouti documentation Project Settings.
Note: "Sequence cut-off" cannot be changed after a deployment has been added. Please ensure the correct time is chosen when creating the project.
Next steps:
Invite others to collaborate on your project
Add a deployment to your project
Was this article helpful?
That’s Great!
Thank you for your feedback
Sorry! We couldn't be helpful
Thank you for your feedback
Feedback sent
We appreciate your effort and will try to fix the article