This guide shows how to add a single deployment to a project by uploading camera trap images from your computer.
This guide is for WildObs platform testers only. You will not be able to sign in to the WildObs test platform if you have not been invited by the WildObs team. If you are interested in becoming a platform tester, please register your interest here.
TABLE OF CONTENTS
1. Navigate to Project / Deployments and add a deployment
2. Enter required fields to enable image upload
3. Upload camera trap images or videos from your computer
4. Complete remaining deployment information
5. New deployment will now appear on the Deployments page
1. Navigate to Project / Deployments and add a deployment
Follow the steps in WildObs Image Platform Quick Start Guide to check the correct "Sequence cut-off" has been saved and navigate to the project you wish to add a deployment to.
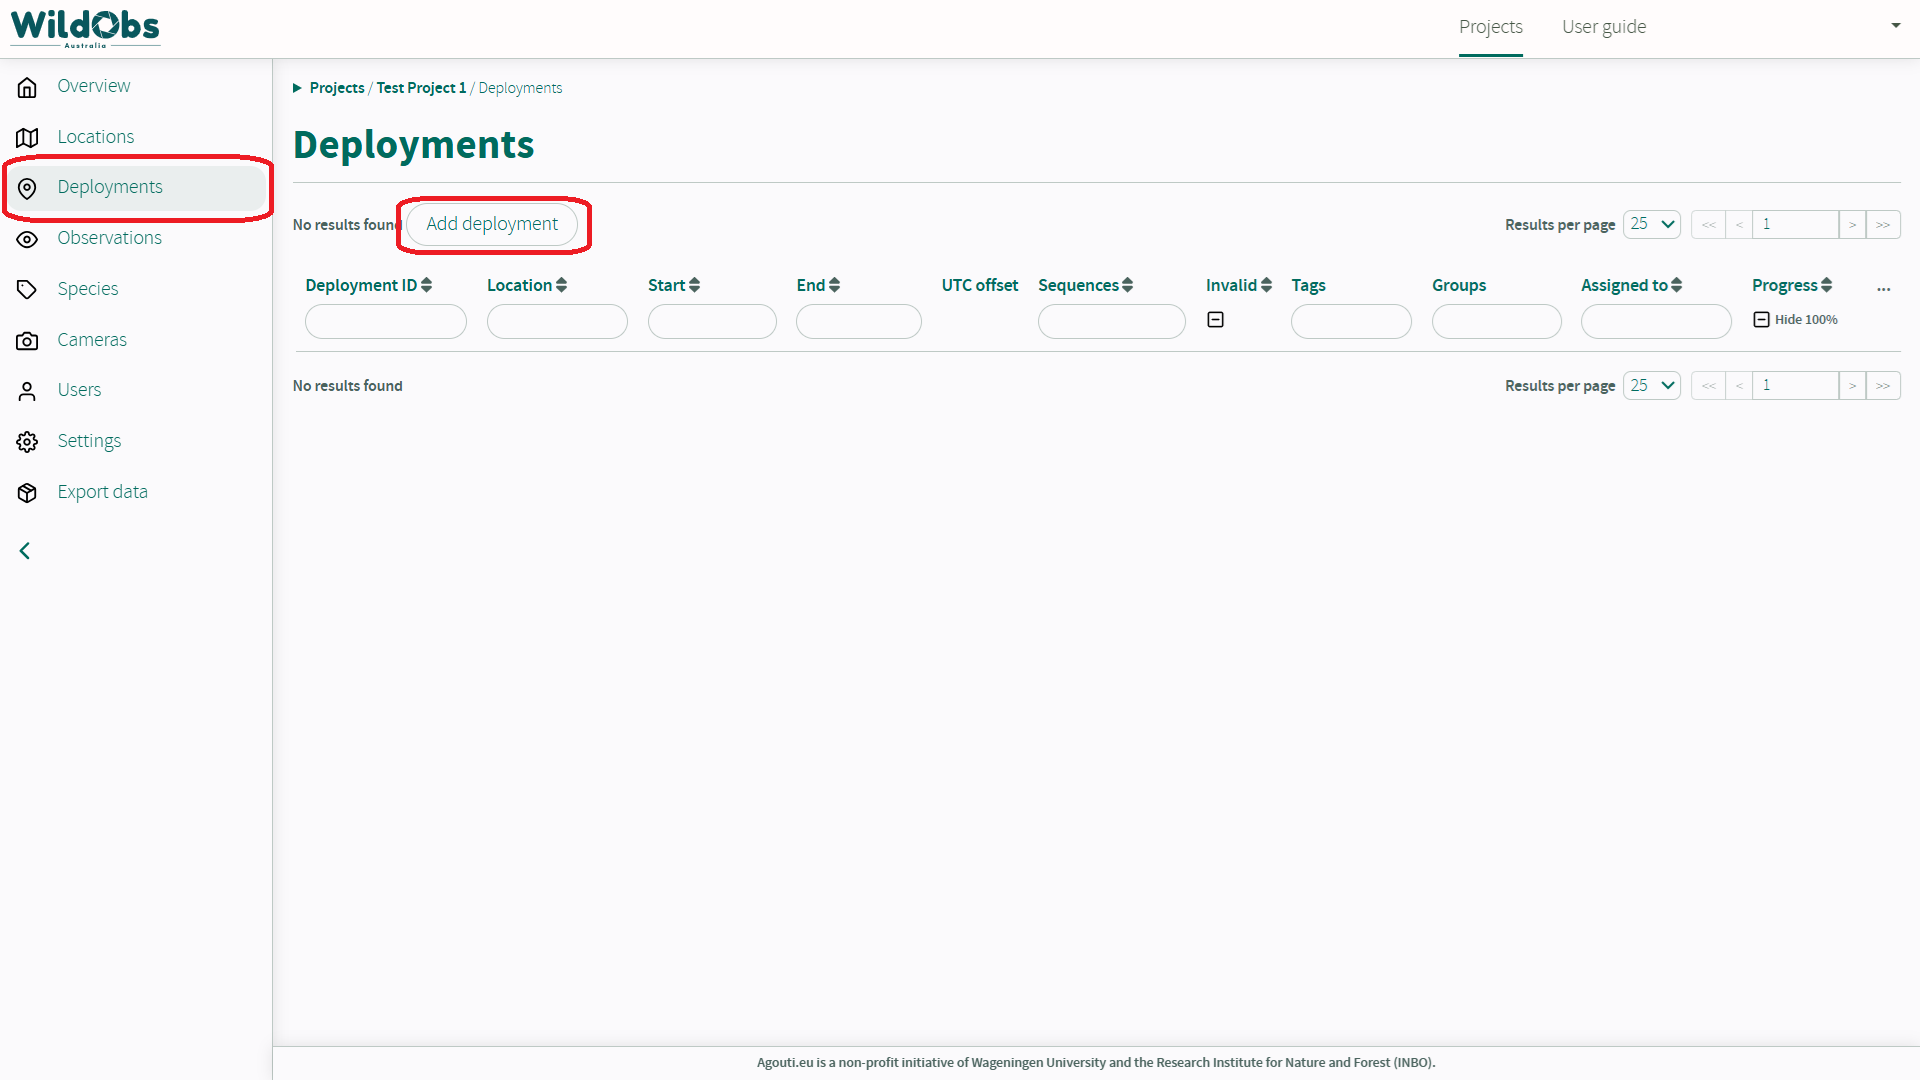
In the left side menu, click "Deployments". This will show the deployments overview page.
Click "Add deployment" to add a new deployment.
2. Enter required fields to enable image upload
Images cannot be uploaded until "Location" and "UTC offset" fields have been entered.
Once required fields have been completed, the deployment will be saved when you click away from this screen, even if no other details have been added.
If a UTC offset was selected in Project Settings, this field will be pre-filled.
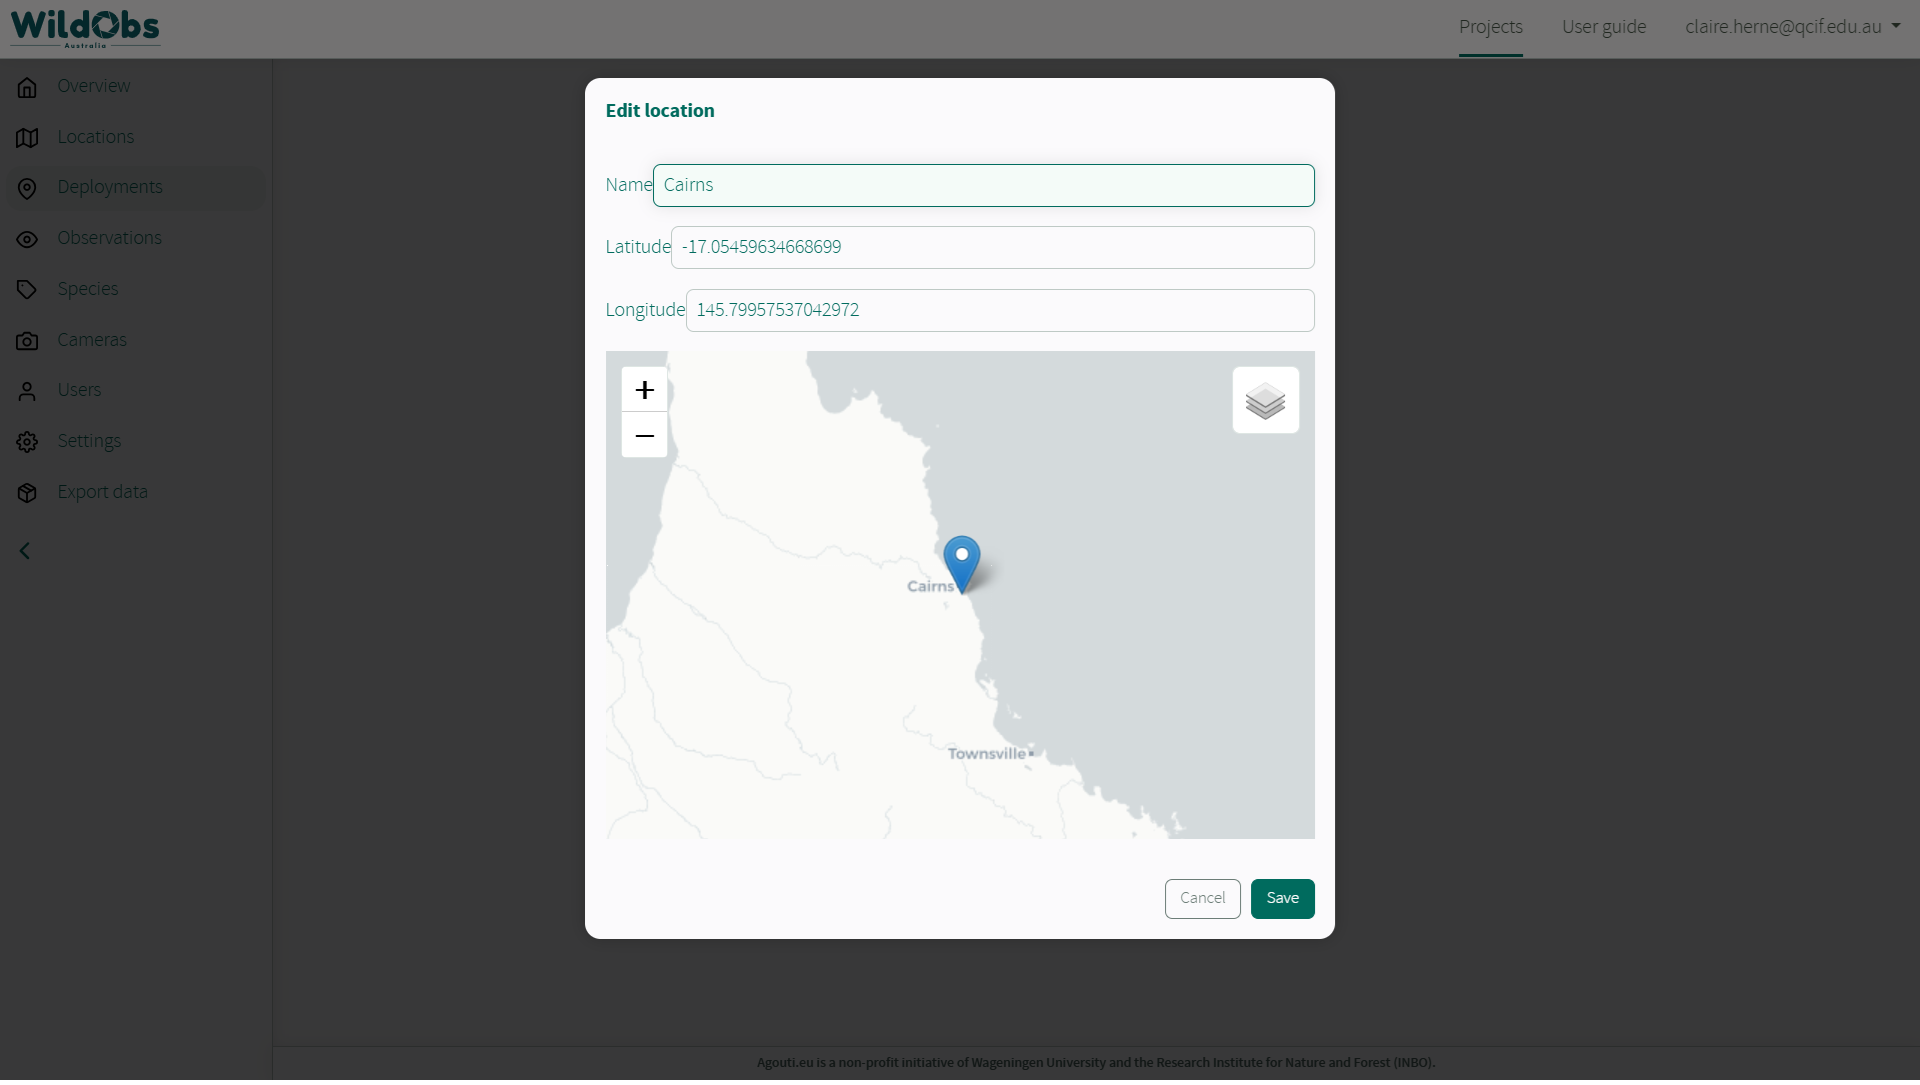
An existing location can be selected by using the drop-down menu "Sampling point". Alternatively, click "Add Sampling Point" to create a new location.

Clicking "Add Sampling Point" will open an "Edit location" modal where a new location can be added.
The location can be selected on the map or by specifying latitude and longitude.
A location can be saved without a location name, but it is not recommended as it might be difficult to select the same location later.
See locationID, latitude and longitude on Camtrap DP Deployments.3. Upload camera trap images or videos from your computer
Once Location and UTC offset have been added, camera trap image or video files can be uploaded from your computer.
Click "Select files" to choose files from a folder or drag and drop images to the upload area.
The platform currently supports JPG and AVI formats. 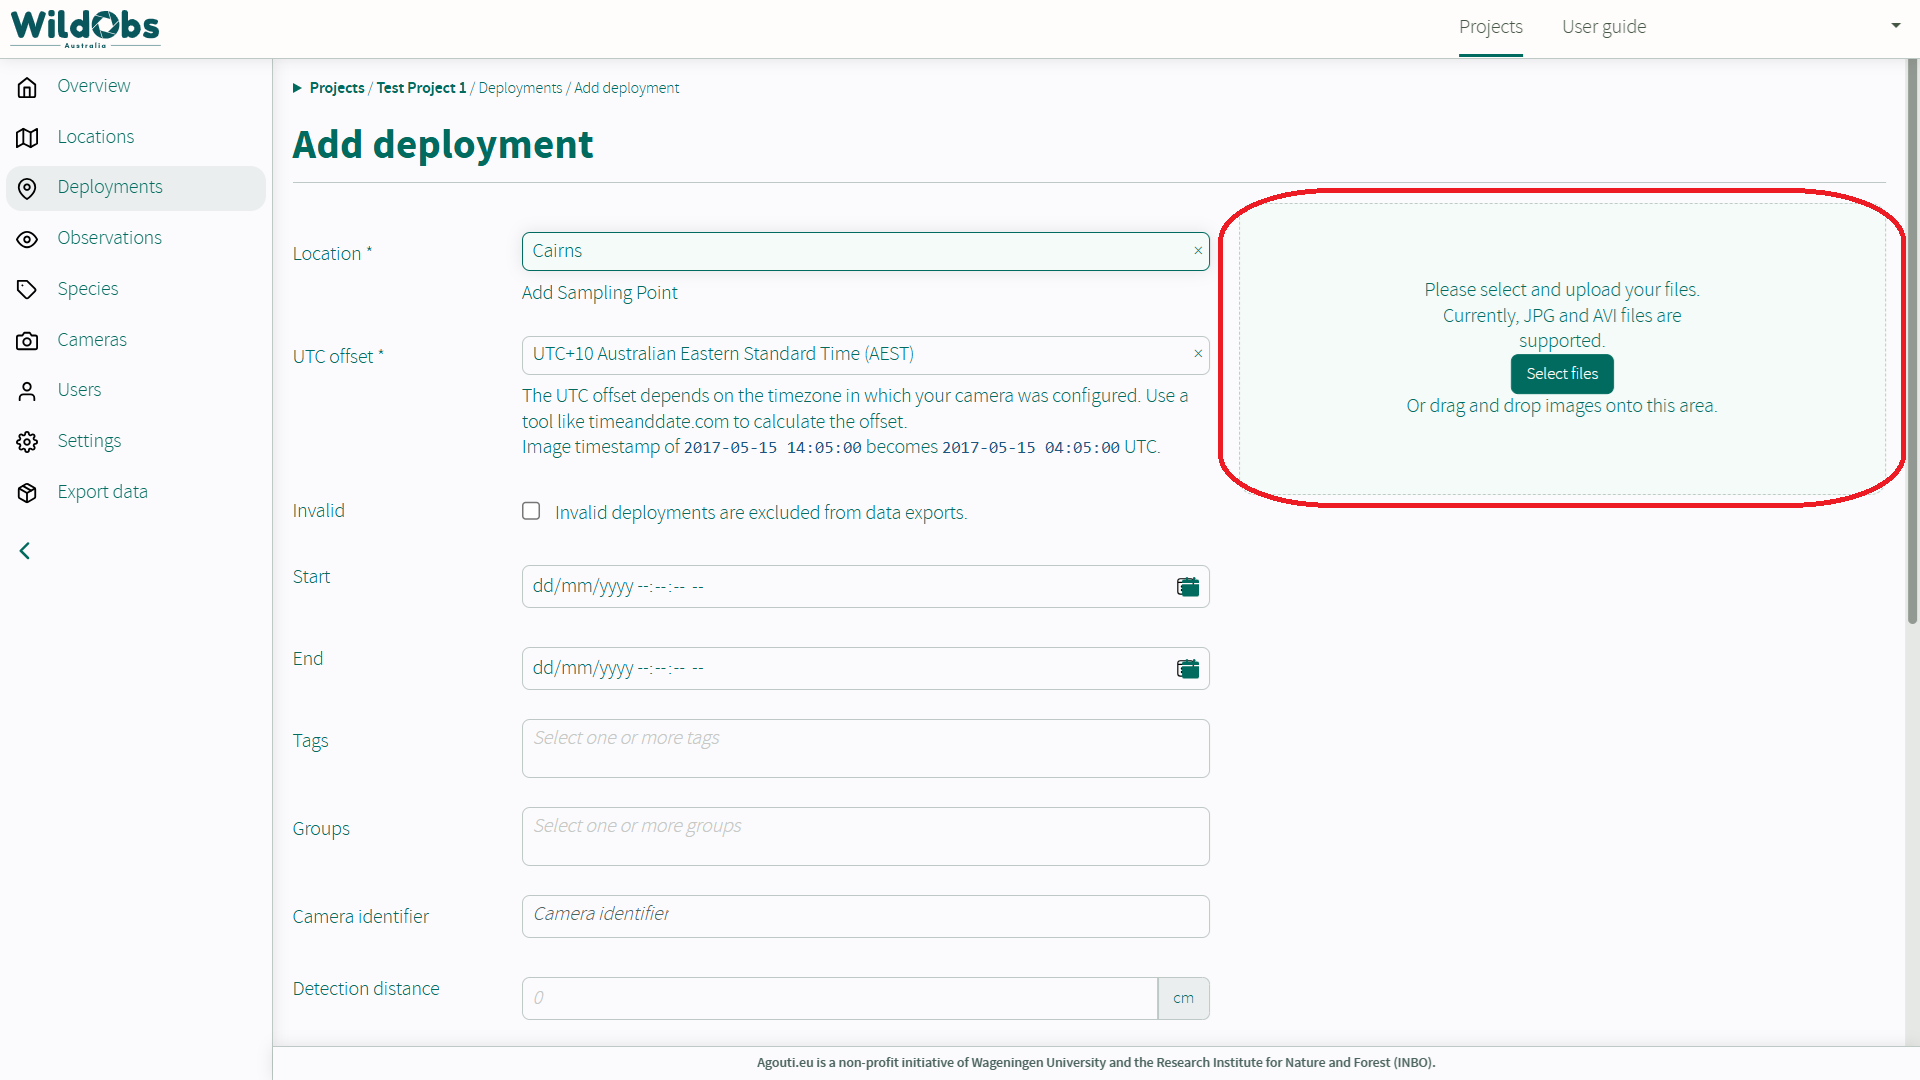
A progress bar will show the upload status and will turn green once complete.
Multiple sets of images can be uploaded while on this page. Images cannot be added to the deployment later.
Do not close or click away from the window while upload is in progress.
4. Complete remaining deployment information
Once all remaining fields have been completed correctly, click "Add deployment" to save.
Deployment information can be edited after the deployment has been saved but no new images
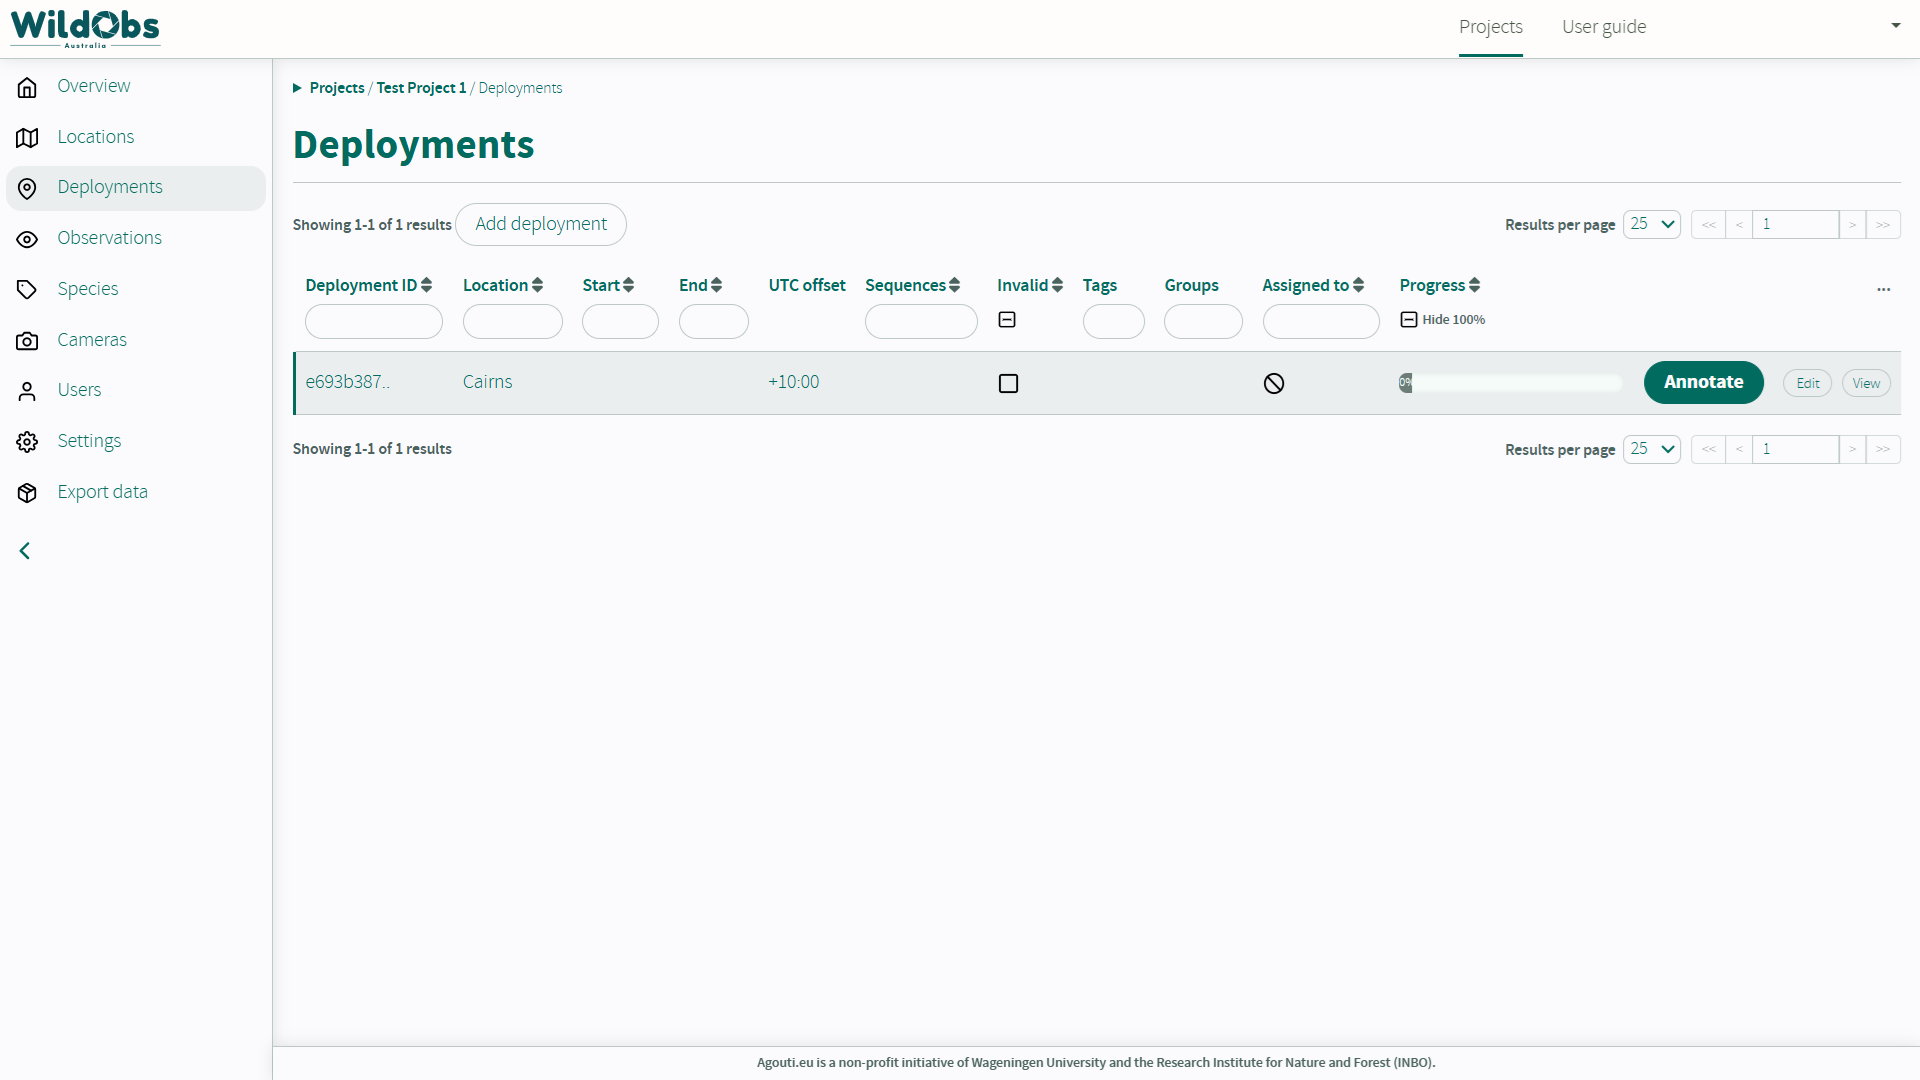
5. New deployment will now appear on the Deployments page
The system will automatically cluster images into sequences based upon the sequence cut-off time chosen in the project settings. This processing may take some time depending on the number of images uploaded.
Once processing is complete, the "Annotate" button will be enabled to allow manual annotation of species in your images.
Next steps
Invite others to collaborate on your project
Enable AI annotations for your project
Was this article helpful?
That’s Great!
Thank you for your feedback
Sorry! We couldn't be helpful
Thank you for your feedback
Feedback sent
We appreciate your effort and will try to fix the article